If Your Keurig Is Clogged, You Might Want To Clean This Overlooked Spot
Home coffee brewing has come a long way in the past 20 years since Keurig entered the commercial market. Since then, the technology has flourished, and improved models are released regularly. Though Keurig pod coffee makers are streamlined for ease of use, they still succumb to common problems like clogging. Thankfully, clogs are typically easily solved. If your Keurig is clogged, your first instinct may be to check the hole that dispenses liquid. However, you would be overlooking the most likely cause — the needles that channel the liquid.
There are two needles in the Keurig: one that punctures the top of the pods and one that punctures the bottom. The top entrance needle allows water to enter the pod and mix with the coffee grounds inside it. Then, the finished coffee drains out through the bottom exit needle. When either needle becomes clogged, liquid can't pass through it. So, if your Keurig seems clogged, it's likely time to clean the needles. To do so, you'll need a ceramic mug, a paper clip, and access to a sink.
How to clean a clogged Keurig needle
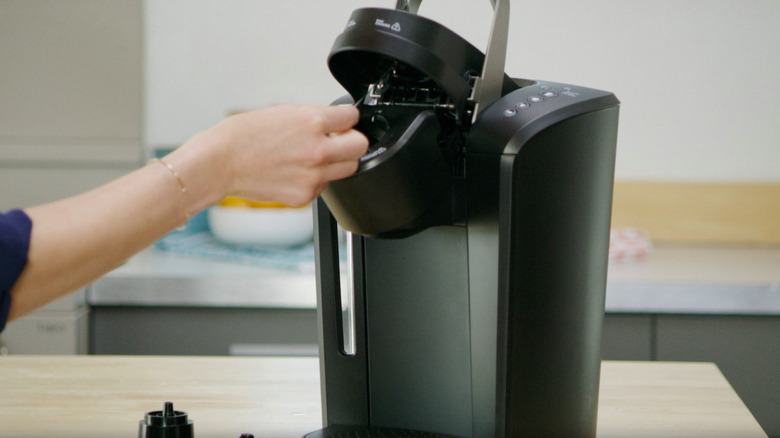
When cleaning your Keurig, your safety is important. Make sure you unplug the device before attempting anything. Then, lift the handle. You should see a downward-facing needle attached to the top. The bottom needle is within the removable pod holder. Grasp the top of the pod holder with one hand and use your other hand to push upwards on the bottom of the holder encasing. The holder should come out easily. Remove the funnel from the bottom of the holder by pulling it straight down. You'll then be able to see a tube on the underside. Straighten the paper clip and insert it through the tube. Wiggle it around to loosen any clog. Finish by carefully cleaning the holder and funnel.
While those pieces dry, look at the entrance needle. You should see two holes on either side. Insert the paper clip in one side and loosen any clog. Repeat this on the other side. To reassemble, snap the funnel bottom back on and align the arrows on the outside of each piece. Place the pod holder back into the machine with the singular arrow facing upward. Pull the handle down to slot the holder in place. Finally, run the brewer for two cycles of water to ensure it runs free and clear.
Maintaining your Keurig
To preemptively thwart any future issues, keep a maintenance schedule. Run a water-only brew once a week to rinse away any residue or oil. It will prevent clogging and contribute to better-tasting coffee. Keurig recommends changing the water filter every two months to keep the water fresh. The company also suggests descaling the reservoir every three months, which is when the reminder light turns on.
Descaling regularly will take care of mineral build-up that might otherwise cause more clogging. You can purchase a descaling solution or opt for vinegar. Either way, you'll add an equal amount of water into the reservoir. You'll then need to activate Keurig's descale mode, which may be different depending on your model. Once it's done, empty the reservoir. Refill it with fresh water and initiate the descale mode again for a rinse cycle. Continue rinse cycles until the descale light turns off.