15 Clever Ways To Repurpose Old Magazines Around Your Home
Copies of publications like magazines can pile up fast, and once you've read through them, they're typically not opened again. If you don't want a mountain of paper sitting in a corner of your home, you have a couple of options. You could throw them out, but this sends them directly to a landfill where they'll sit with the other 17 million-plus pounds of paper (per the EPA in 2018). Recycling is a better option, but perhaps you want to be more creative with your magazines instead. If so, reusing them for DIY projects around your home is the best choice. Repurposing a versatile material like paper allows you to create art, decor, and other household goods you'd otherwise have to buy, which could save you money. Plus, it gives you the opportunity to create personalized pieces that can make your home feel unique. We've compiled a list of 15 clever ways to repurpose magazines and keep them out of a landfill.
Regardless of your crafting experience, you will definitely be able to transform your old magazines into one of the following pieces of eye-catching decor. Most of these projects will require at least scissors and a sealant to protect the paper from damage. If you need to purchase a sealant, Mod Podge is a popular, inexpensive product that is widely-available. It is typically stocked by hobby and craft stores and can also be found online through retailers like Amazon.
1. Papier-mâché decor
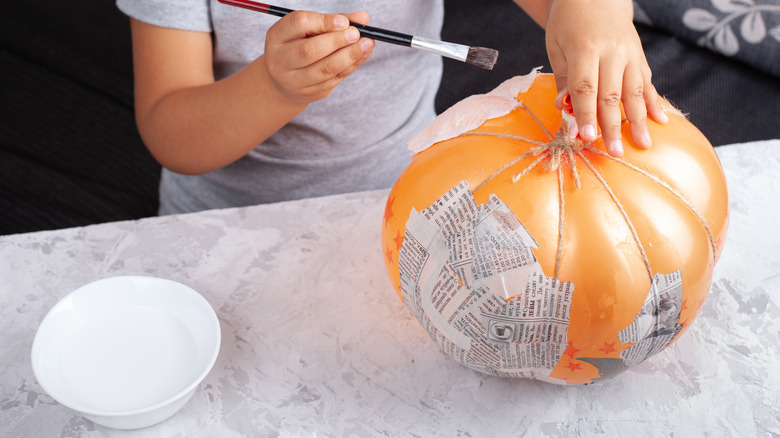
Papier-mâché is the art of making sculptures with bonded strips of paper or molded paper pulp. You can make many different types of sculptures with magazines and a paste mixture. You'll need to combine 1 cup of flour and 2 cups of water to make the mixture. Lie moistened strips of magazine pages or mold blended pulp over something that has a shape similar to what you want to create. For example, you can papier-mâché half of a balloon for an easy DIY bowl. Once you pop the balloon, the paper will stay in the shape of the bowl.
2. Wall art prints
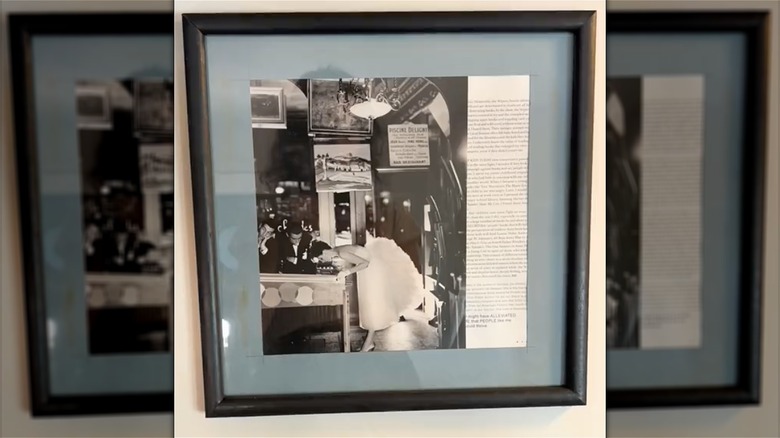
Some magazines, like those from National Geographic and Vanity Fair, are known for their stunning images and covers. Framing them preserves the artwork that would otherwise go unseen after a month. It also allows you to curate a collection of inexpensive wall art. Consider framing the pieces and displaying multi-part editorials to create the perfect gallery wall. These images can bring a bit more interest to an otherwise unremarkable hallway or other space in your home.
3. Collage wall art
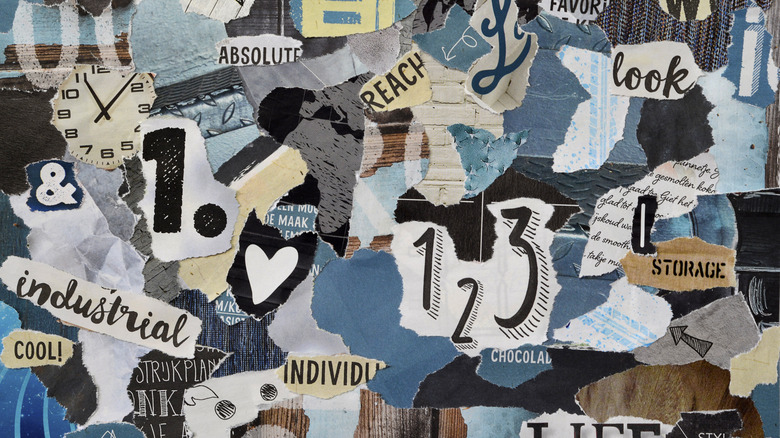
It may have been a while since you last made a collage, but have no fear, it's just as easy as you remember. Take your time and cut pictures out of the magazines that strike you. It doesn't matter if you have a plan in mind, simply cut out what you like. Then, arrange them on a poster board, piece of cardboard, or other backing and play around with the placement until you create a larger picture that you enjoy. Once you're happy with the arrangement, glue them down and apply Mod Podge to seal everything in. Finally, display the piece in your home.
4. Faux flowers

Fresh flowers, while beautiful, wilt and die. Paper flowers, on the other hand, endure the test of time. Regardless of your experience with paper crafting or origami, you can make decorative faux flowers from old magazines. Utilize the colors of the magazine pages or paint them to create the exact color scheme you want. No matter what design you create, brush on a layer of Mod Podge to preserve the paper and keep it from becoming damaged. You can then use sticks, pipe cleaners, skewers, or a similar item for the stems and place them in a vase.
5. Paper bead curtain

A paper bead curtain is a stylish room divider that's perfect for a boho look. To create this piece, start by measuring your doorframe to see where to mount a curtain rod and how long the strings should be, then cut the magazine pages into tall triangle pieces with a 1-inch base. You'll then wrap the triangles around a toothpick to create an oval-shaped paper bead, which you'll cover in Mod Podge. Once the beads are dry, you'll slide them onto the string. Finally, tie these strings to hooks and place them on the curtain rod in the doorway.
6. Decorative boxes
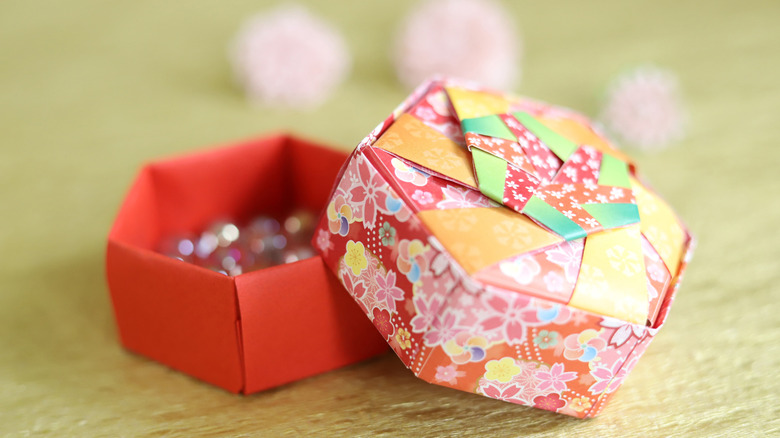
Store small items like paper clips, sticky notes, and sewing supplies in cute paper boxes. By making specific folds in a magazine page, you'll create a low-cost storage option. The more experience you have with paper folding like origami, the more intricate your design can become. However, there are many beginner-friendly ways to construct a paper box. Most guides will instruct you to create triangles that will come together to form a sturdy box with five sides.
7. Abstract rolled paper art
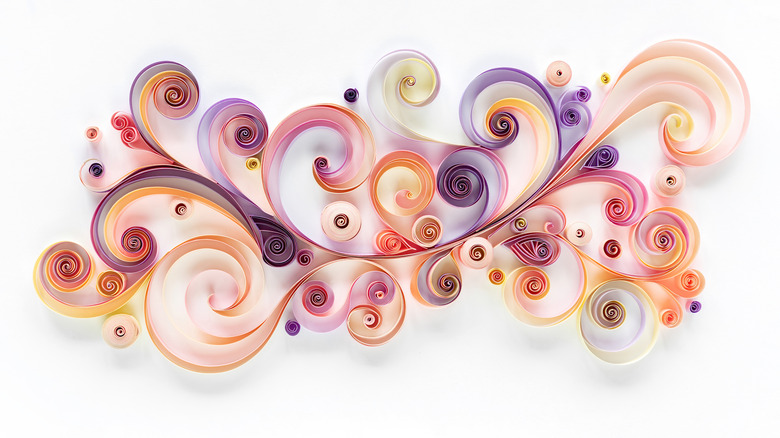
Create three-dimensional art with rolled paper wall art. Rolled paper can be assembled to form beautiful scenes or colorful abstract pieces. Similar to the paper bead curtain DIY, you'll need narrow triangles and something to wrap them around. The wider the base, the larger the paper pieces will be. Additionally, what you choose to wrap the paper around will also determine the size of the coil. Glue the paper rolls to a backing of your choice. You may want to add a frame, but avoid using any glass to prevent flattening your dimensional wall art.
8. Decoupage
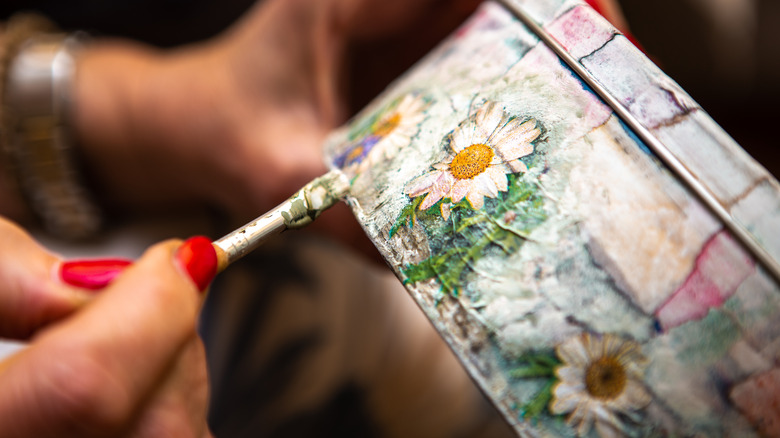
Decoupage is a creative way to personalize any decor in your home. For this project, you'll need magazine clippings of your choice, a paintbrush with a flat end, and Mod Podge. Additionally, you can also use gold leaf and glossy overcoats for an elevated appearance. The process is simple and typically consists of gluing the paper onto the item you wish to decorate and applying another layer of sealant or varnish over the top to keep everything secure.
9. Wreath
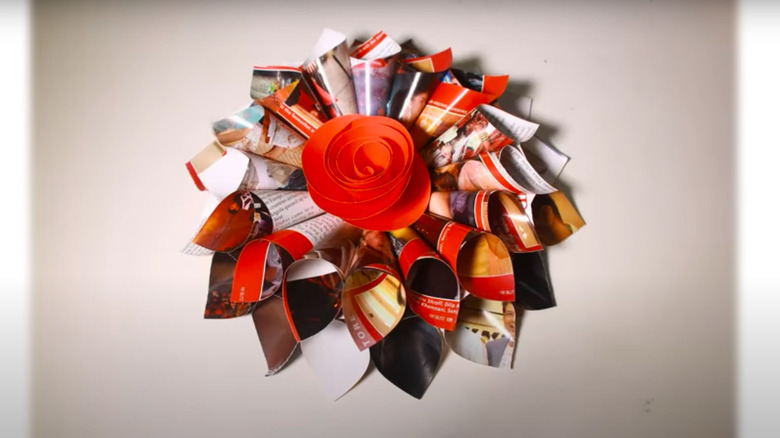
Paper wreaths can be as complex and intricate or as simple to create as you desire. New crafters and children may prefer a simple wreath constructed out of layered shapes cut out from magazine pages, while those who are feeling a bit bolder should consider folding or rolling the paper into a three-dimensional shape before creating layers. DIY wreaths are an easy way to make your home more eco-friendly, as they're a better option than traditional live wreaths or their plastic counterparts. However, keep in mind that a paper wreath should be used to decorate indoors and not outside, as it would get damaged by the weather.
10. Butterfly garland
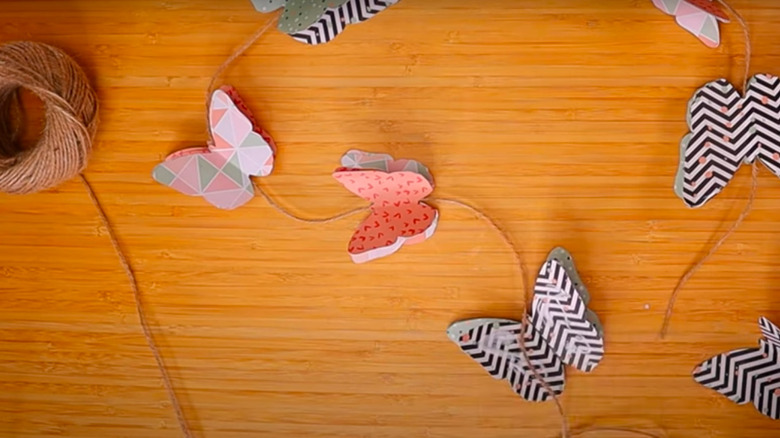
Butterfly garlands are a delightful craft that will brighten up any room or party. Though there are a few ways to make paper butterflies, the simplest is to layer two butterfly cut-outs with a string between them. Other ways include folded accordion-like butterflies affixed to string. Regardless of how you assemble your garland, paper butterflies are a great craft project for you and any little ones who wish to decorate. You could also make a garland that featured another shape instead like stars, Christmas trees for the holidays, or hearts.
11. Hanging stars

There are numerous ways to make a paper star out of a page in a magazine. Some people use thin strips to make tiny company stars, while others stick with simple three-dimensional star cutouts. Regardless of what size you want your stars to be, you can attach them to string and hang them from the ceiling. Hanging paper stars will give a room a dreamy quality. They're perfect for kid's rooms, classrooms, and other spots where you could use some whimsical accents.
12. Magazine bowl
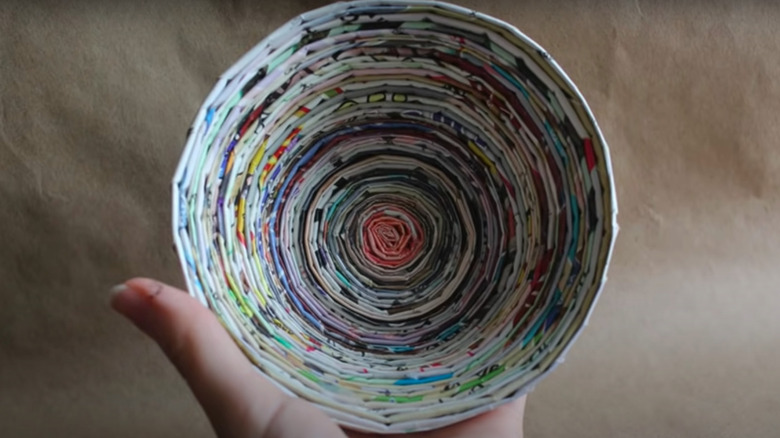
The folded paper strip method for making bowls produces a colorful and sturdy alternative to store-bought decorations that could be great for storing keys in the entryway. Begin by tightly rolling 30 to 40 pages starting from a corner and tape the edges to create tubes. Then, flatten the edges of one tube and make a tightly-wound coil. Take your next tube and insert the end into the free end of the coil and continue this process. Glue the last tube down, let it dry, and carefully push in the center to make the flat disk shape into a concave bowl. Glue the interior so everything stays together.
13. Decorative picture frames
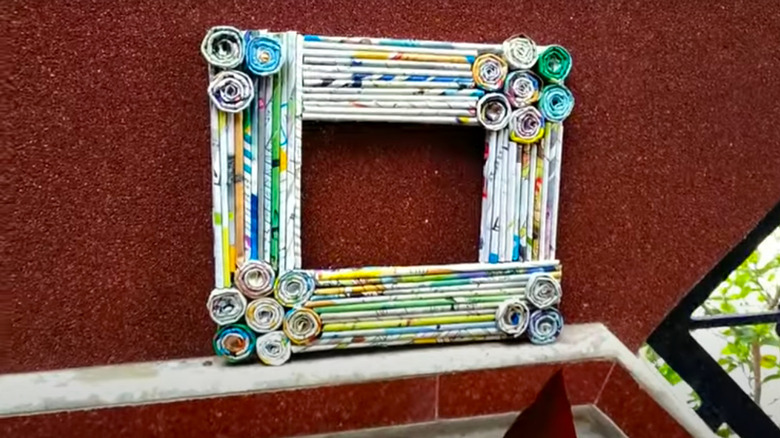
While you could certainly decoupage a frame, you can also apply a technique similar to the one used to make the rolled magazine bowl. Start by gluing flat pieces of paper to the frame to create a base layer. Next, roll magazine pages from the corner; use a pencil or toothpick in the middle to help you keep a tight roll. Combine pages by inserting one end of the rolled paper tube into another. Then, glue the straw-like tubes to the base layer and fill in all the space. Add a layer of Mod Podge to preserve the piece.
14. Coasters
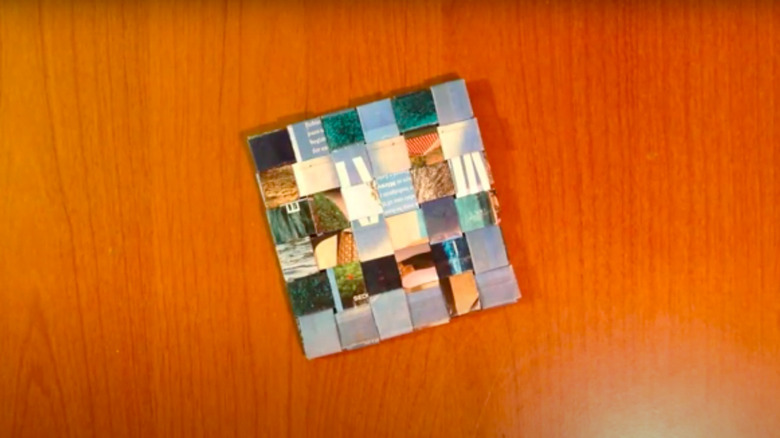
There are a few ways to make magazine paper coasters. One method is nearly identical to creating the base of a bowl, while others utilize a weaving technique. The weaving technique, depending on the pages you use, can produce an interesting checkered pattern. Constructing a woven coaster will ultimately be less time-consuming, so it's a neat project to do with children. The process is repetitive too and mainly consists of layering strips of paper like one would do with a wicker basket. Once completed, if you want to make your coasters more water-resistant, you could add a layer of plastic or glass on top.
15. Word art
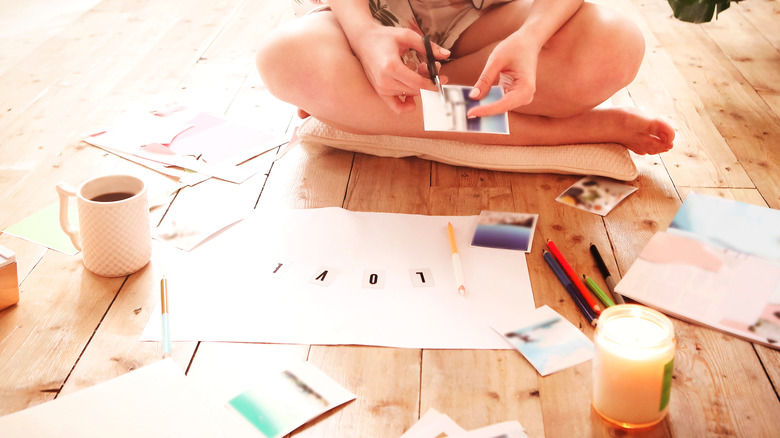
Magazines are usually full of articles and ads that use interesting fonts, so consider spelling out your favorite quote with magazine clippings to create word art. Your background can be a blank canvas to really highlight the message, or you can create a background that blends with the text to become an intricate art piece. A collage background would give the piece a lot of visual impact, but a simple phrase on a watercolor painting could be just as impactful. Thrifted art pieces also make an interesting background for text clippings. When you're done, simply hang the piece up in your home.