How To Fix An Unsightly Crack In Your Ceiling With Some DIY Handiwork
We may receive a commission on purchases made from links.
Small cracks along your ceilings are a normal part of your house settling. As long as they're not very wide and don't travel down your walls or come accompanied with evidence of water damage, they're nothing to worry about. However, they can certainly look alarming. Even if they're just unsightly, it's not a bad idea to get them fixed. Luckily, although it takes some time and precision, it's not a difficult task to DIY. You'll need both setting compound and joint compound, some drywall paper, plus paint supplies to finish it all off. It may seem like a lot, but even if you have textured ceilings, it's possible to do this yourself.
Of course, just because something can be done on your own doesn't mean it should be if you don't feel comfortable with the task. Services like Angi and its subsidiary HomeAdvisor will offer lists of local professionals, price estimates, and ratings for this kind of repair work, and their options usually range from the general handyperson to building contractors. If your budget doesn't allow for that type of assistance, however, and you have a handy friend or family member, perhaps enlist them to help you, or look to a service like TaskRabbit, where you can find locals who lend out their skills for usually more reasonable fees than the pros.
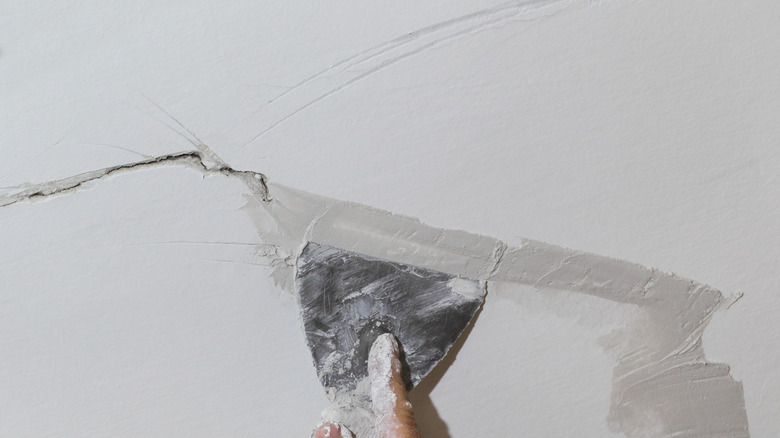
Fixing the crack
You're going to use a setting-type compound to repair the inside of the ceiling, so you need to create space enough for the compound to get in and around the crack. Do this simply by using a drywall knife to carve out a little extra groove through the crack in a V shape. Mix the setting compound and fill it into the crack in small batches, as it dries quickly. The first layer fills the crack, but the second layer should lay on top of the crack and be much wider than it, to accommodate the drywall tape. Press the tape onto this layer while it's still wet, and use your trowel, knife, or scraper to flatten it to the surface. Make sure you eliminate any bubbles. Apply a third, very thin layer of setting compound on top of the tape, scrape off the excess, and wait for it to dry. Sand down any sharp edges, then move onto the joint compound.
Apply joint compound, starting at the tape and fading gradually outward so the ceiling looks seamless. Once it dries, lightly sand it, then repeat this process 1-2 more times or more if needed. When satisfied, prime the area and paint. Make sure you paint match to your old paint exactly, or you'll find yourself painting the whole ceiling to make your repairs invisible.
What to do with textured ceilings
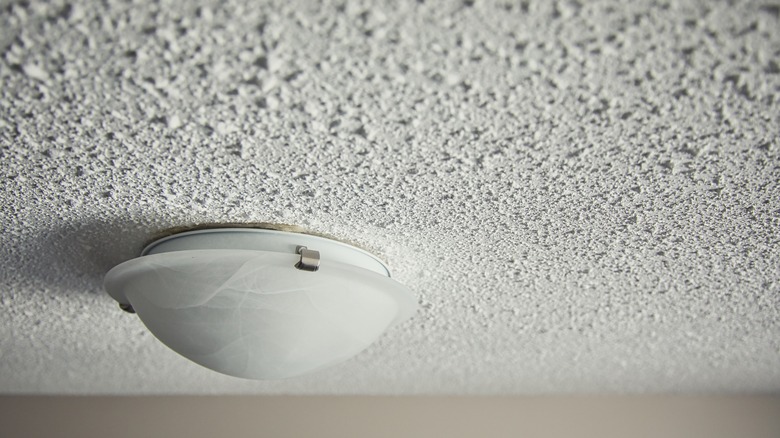
If you have a textured ceiling, fear not! This DIY is for you too. After applying all necessary coats of the joint compound, waiting for it to dry, and sanding to your satisfaction — making sure not to sand down so far that the drywall tape is visible — you can apply your particular texturing type. If you have knockdown, popcorn, or orange peel textured ceilings, there are sprays and patch kits that will apply the necessary texture with ease. Simply follow the package directions and let it blend in with your existing surface.
For skip trowel and stomped (or stamped) ceiling textures, you're going to need some extra joint compound. This is in addition to what you will use in the repair, and it's recommended to use a topping compound because it's thinner and more workable. Skip trowel, as it sounds, uses a trowel to apply the compound. Gather some on the edge of the trowel and run it across the area at an angle, first one way, then the other. The beauty of skip trowel is there's no distinct pattern to match, so any coverage you're happy with is perfect. For stamped ceilings, roll the compound on thickly and then stamp it with a textured brush in the appropriate pattern. There are a wide variety at hardware stores like Home Depot. Don't forget to blend with your existing pattern! When dry, prime and paint as directed above.